
| 일 | 월 | 화 | 수 | 목 | 금 | 토 |
|---|---|---|---|---|---|---|
| 1 | 2 | 3 | 4 | 5 | 6 | 7 |
| 8 | 9 | 10 | 11 | 12 | 13 | 14 |
| 15 | 16 | 17 | 18 | 19 | 20 | 21 |
| 22 | 23 | 24 | 25 | 26 | 27 | 28 |
| 29 | 30 |
- tag
- option
- !doctype html
- Head
- Form
- 속성 선택자
- ::first-line
- textarea
- ul
- :active
- Li
- colspan
- 한정수 강사님
- Border
- Python
- ::before
- BR
- JavaScript
- 전체 선택자
- ::first-letter
- rowspan
- img
- Title
- 인라인 레벨 요소
- Ol
- BODY
- select
- table
- JAVA 개발 환경 설정
- HTML정의
- Today
- Total
개발 공부 기록하기
Section 7. CSS 선택자의 세계(2) 본문
07. 인접 선택자 & 직계 자손 선택자
두 선택자는 꼭 알아둬야하지만
앞에서 배운 요소 선택자, ID 선택자, 클래스 선택자보다는
자주 쓰이진 않는다.
인접 선택자( = 결합자)
두 선택자 사이에 '+' 기호를 써서 표기하는데,
h1 + p {
   color: red;
}
처럼 쓴다면, h1 바로 다음에 오는 p를 선택하라는 의미이다.
(실제로 선택되는 것은 + 뒤에 나오는 선택자인 것!)
그리고 +로 연결된 두 선택자 간의 관계는 '부모-자식'관계가 아니라 '형제'관계이다.
직계 자손 선택자
두 선택자 사이에 '>' 기호를 써서 표기한다.
인접 선택자에서 '형제' 관계였던 것과 달리 '부모-자식' 관계이다.
div > nav {
   color: white;
}
위와 같이 쓰면 <div>의 바로 안에 쓰인 <nav>에 그 스타일을 적용하라는 뜻이 된다.
이것이 자손 선택자와 다른 점이 뭐냐면,
자손선택자의 경우에는
<!DOCTYPE html>
   <html>
      <head>
         <meta charset="UTF-8">
         <title>예시</title>
         <style>
            a {
              text-decoration: none;
              color: black;
            }
            footer a {
               color: salmon;
            }
         </style>
      </head>
      <body>
         <footer>
           <a href="https://from-ms-to-developer.tistory.com/">블로그 링크1</a>
           <br/>
           <p>
              <a href="https://from-ms-to-developer.tistory.com/">블로그 링크2</a>
           </p>
         </footer>
         <a href="https://from-ms-to-developer.tistory.com/">블로그 링크3</a>
      </body>
   </html>
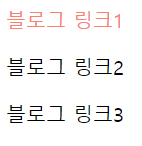
위의 코드처럼 쓰게 되면

이렇게 <footer> 안에 있는 모든 <a>에 스타일이 적용이 되지만,
직계 자손 선택자를 쓴다면,
(위의 코드는 똑같고, 단지 직계냐 아니냐 차이만 있다.)
<!DOCTYPE html>
   <html>
      <head>
         <meta charset="UTF-8">
         <title>예시</title>
         <style>
            a {
              text-decoration: none;
              color: black;
            }
            footer > a {
               color: salmon;
            }
         </style>
      </head>
      <body>
         <footer>
           <a href="https://from-ms-to-developer.tistory.com/">블로그 링크1</a>
           <br/>
           <p>
              <a href="https://from-ms-to-developer.tistory.com/">블로그 링크2</a>
           </p>
         </footer>
         <a href="https://from-ms-to-developer.tistory.com/">블로그 링크3</a>
      </body>
   </html>
정말 꺽쇠 하나만 더 넣었을 뿐이다.
그런데 결과는 요로케 달라졌다.
<footer>의 직계 자손인 첫번째 <a>에만 스타일이 적용된 것!
<footer>의 손자뻘(?)인 두번째 <a>에는 스타일이 적용되지 않은 것을 확인할 수 있다.
08. 속성 선택자
같은 속성을 가지고 있는 모든 요소에 스타일을 적용할 때 사용된다.
input[type="text"] {
   width: 300px;
   color: blue;
}
와 같이, 적용하려는 그 속성을 대괄호 [ ] 안에 넣어서 작성한다.
(단! 주의할 점은 대괄호 앞에 적힌 요소와 대괄호 사이에 공백이 있으면 안 먹힌다! 꼭 붙여 써야 한다!!)
(내가 만든) 예시 1.
<!DOCTYPE html>
   <html>
      <head>
         <meta charset="UTF-8" />
         <style>
            input[type="text"] {
               width: 300px;
               color: blue;
            }
            label {
               font-weight: bold;
            }
         </style>
      </head>
      <body>
         <label for="id">TEXT </label>
         <input id="id" type="text"/>
         <br/>
         <label for="password">PASS </label>
         <input id="password" type="password" />
      </body>
   </html>
↓

(내가 만든) 예시 2.
<!DOCTYPE html>
   <html>
      <head>
         <meta charset="UTF-8" />
         <style>
            .strong {
              background-color: #bb1200;
              color: #fff;
            }
            section[class="strong"] {
              text-align: center;
              font-weight: bolder;
              font-size: 150%;
            }
         </style>
      </head>
      <body>
         <section class="strong">
            2023년 새해가 밝았습니다!
         </section>
         <section>
           모두 하시는 일 다 대박나시고
         </section>
         <section>
           원하시는 거 모두 다 이루시는 한 해가 되길 바라요!
         </section>
         <p class="strong">그리고 2023년은 검은 토끼의 해래요!</p>
      </body>
   </html>
↓

하지만 강사님 설명에 따르면 예시 2와 같은 방법은 실제로는 그다지 쓰이지 않는다고.....
오히려,
https://from-ms-to-developer.tistory.com/entry/DAY-23-%EC%86%8D%EC%84%B1-%EC%84%A0%ED%83%9D%EC%9E%90
DAY 23. 속성 선택자
요약은 포스팅 맨 아래에 표로 정리했다. 1. [속성] - 특정 속성이 있는 요소를 선택 특정 요소 중에서 찾으려고 하는 속성 이름이 있는 요소를 선택할 때. ex, 요소 중에서 href 속성이 있는 요소 선
from-ms-to-developer.tistory.com
와 같은 것들이 더 자주 쓰인다고 한다..ㅎㅎ
(그 중에서도 등호만 있는 것이 제일 자주 쓰인다고 한다.)
이전에 정리했던게 있어서 그냥 그걸로 갈음해야겠다..ㅎ
09. 가상 클래스
선택자 끝에 붙여서 '~에 한해서'라는 조건을 다는 느낌의 키워드들을 가상 클래스라고 부른다.
이것으로 체크되어 있는 체크박스, 커서를 올려둔 요소, 아니면 각각의 버튼 등을 선택할 수 있다.
가상 클래스를 사용하겠다는 의미로 ':' 표시, 즉 colon을 써준다.
:hover
커서가 올려진 특정 상황에서의 효과를 설명해주는 가상 클래스. (즉, 커서를 갖다 대면 스타일이 변한다.)
주로 링크를 담고 있는 <a>나 <button> 등 웹 페이지 속 도처에서 확인할 수 있다.
a:hover {
   text-decoration: underline;
}
이런 식으로 띄어쓰기 없이 :hover를 붙여쓰게 되면,
사용자가 커서를 댔을 때 스타일이 변하게 된다.
:active
활성화되었을 때(= 클릭했을 때) 효과가 나타나게 만드는 가상 클래스이다.
위에서 다룬 :hover와 섞어서 쓸 수 있다.
그 말은 즉슨, 커서만 댔을 때는 :hover에서 적용한 스타일이, 클릭을 하면 :active에서 적용한 스타일이 나타난다는 의미이다.
.post button:active {
     background-color: #02c39a;
}
위와 같이 쓰게 된다면 class="post"로 적힌 부모 요소의 자식 요소인 button을 클릭하면 배경색이 #02c39a로 바뀐다는 것이다..!!
(내가 만든) 예시 3.
<!DOCTYPE html>
   <html>
      <head>
         <meta charset="UTF-8" />
         <style>
            p {
              font-weight: bold;
            }
            fieldset {
              border: 1px solid transparent;
              background-color: rgba(169, 155, 134, 0.4);
              border-radius: 20px;
              width: 150px;
            }
            div {
              display: block;
            }
            button {
              line-height: 2;
              font-weight: bold;
              color: #fff;
              border: 0.5px double #432417;
              border-radius: 15px;
              padding: 5px;
              background-color: #a99b86;
            }
            .coffee {
              font-size: 15px;
              line-height: 2;
            }
            .coffee button:hover {
              background-color: #ab8874;
              color: #fff;
            }
            .coffee button:active {
              background-color: #7b5443;
              color: #fff;
            }
         </style>
      </head>
      <body>
         <section class="coffee">
            <p>
               주문하실 메뉴를 선택해주세요.
            </p>
            <fieldset>
               <div>
                  <input type="checkbox" id="americano"/>
                  <label for="americano">아메리카노</label>
               </div>
               <div>
                  <input type="checkbox" id="caffelatte"/>
                  <label for="caffelatte">카페라떼</label>
               </div>
               <div>
                   <input type="checkbox" id="mocca"/>
                  <label for="mocca">카페모카</label>
               </div>
               <div>
                  <input type="checkbox" id="caramel"/>
                  <label for="caramel">카라멜 마끼아또</label>
               </div>
            </fieldset>
            <br />
            <button>주문하기</button>
         </section>
      </body>
   </html>
↓

:checked
단어 뜻 그대로 체크를 했을 때 스타일이 바뀌는 가상 클래스이다.
<!DOCTYPE html>
   <html>
      <head>
         <meta charset="UTF-8" />
         <style>
            fieldset {
              width: 300px;
              height: 30px;
            }
            input, label {
              line-height: 2;
            }
            input[type="checkbox"]:checked {
              box-shadow: 0 0 0 3px #ffb21b;
            }
            input[type="radio"]:checked {
              box-shadow: 0 0 0 3px #ff5588;
            }
         </style>
      </head>
      <body>
         <fieldset>
            <input type="radio" id="yes" name="yes-or-no"/>
            <label for="yes">Yes</label>
            <input type="radio" id="no" name="yes-or-no"/>
            <label for="no">No</label>
         </fieldset>
         <fieldset>
            <input type="checkbox" id="check-me"/>
            <label for="check-me">Check me!</label>
         </fieldset>
      </body>
   </html>
↓

:nth-of-type()
형제 관계에 있는 요소들 중에서 그 위치에 따라 규칙을 적용하는 방식으로 스타일을 적용하는 가상 클래스이다.
예를 들어 5, 10, 15번째 상자는 배경색을 바꾸는 것과 같은 스타일을 적용할 경우 쓰인다.
(내가 만든) 예시 4.
<!DOCTYPE html>
   <html>
      <head>
         <meta charset="UTF-8" />
         <style>
            li {
               width: 50px;
               height: 30px;
               line-height: 1.7;
               list-style: none;
               display: inline-block;
               border: 1px solid #999;
               padding: 2px;
               margin: 0 auto;
               text-align: center;
            }
            li:nth-of-type(3) {
               background-color: #ccc;
               border: 3px solid #999;
            }
         </style>
      </head>
      <body>
         <ul>
            <li>1st</li>
            <li>2nd</li>
            <li>3rd</li>
            <li>4th</li>
            <li>5th</li>
            <li>6th</li>
            <li>7th</li>
            <li>8th</li>
            <li>9th</li>
         </ul>
      </body>
   </html>
↓

그런데,
:nth-of-type(3n)이라고 쓰면 어떻게 될까?
<!DOCTYPE html>
   <html>
      <head>
         <meta charset="UTF-8" />
         <style>
            li {
               width: 50px;
               height: 30px;
               line-height: 1.7;
               list-style: none;
               display: inline-block;
               border: 1px solid #999;
               padding: 2px;
               margin: 0 auto;
               text-align: center;
            }
            li:nth-of-type(3n) {
               background-color: #ccc;
               border: 3px solid #999;
            }
         </style>
      </head>
      <body>
         <ul>
            <li>1st</li>
            <li>2nd</li>
            <li>3rd</li>
            <li>4th</li>
            <li>5th</li>
            <li>6th</li>
            <li>7th</li>
            <li>8th</li>
            <li>9th</li>
         </ul>
      </body>
   </html>
↓

이걸 응용하게 되면,
<!DOCTYPE html>
   <html>
      <head>
         <meta charset="UTF-8" />
         <style>
            table {
              width: 400px;
              height: 200px;
              border-collapse: collapse;
            }
            tr, td {
               line-height: 1.5;
               list-style: none;
               border: 1px solid #999;
               padding: 2px;
               margin: 0 auto;
               text-align: center;
            }
            td:nth-of-type(2n) {
               background-color: #ccc;
            }
         </style>
      </head>
      <body>
         <table>
            <tr>
              <td>1행1열</td>
              <td>1행2열</td>
              <td>1행3열</td>
              <td>1행4열</td>
            </tr>
            <tr>
              <td>2행1열</td>
              <td>2행2열</td>
              <td>2행3열</td>
              <td>2행4열</td>
            </tr>
            <tr>
              <td>3행1열</td>
              <td>3행2열</td>
              <td>3행3열</td>
              <td>3행4열</td>
            </tr>
            <tr>
              <td>4행1열</td>
              <td>4행2열</td>
              <td>4행3열</td>
              <td>4행4열</td>
            </tr>
         </table>
      </body>
   </html>
↓

가로 줄무늬 표를 만든다면?
td 대신에 tr을 써주면 된다!
<!DOCTYPE html>
   <html>
      <head>
         <meta charset="UTF-8" />
         <style>
            table {
              width: 400px;
              height: 200px;
              border-collapse: collapse;
            }
            tr, td {
               line-height: 1.5;
               list-style: none;
               border: 1px solid #999;
               padding: 2px;
               margin: 0 auto;
               text-align: center;
            }
            tr:nth-of-type(2n) {
               background-color: #ccc;
            }
         </style>
      </head>
      <body>
         <table>
            <tr>
              <td>1행1열</td>
              <td>1행2열</td>
              <td>1행3열</td>
              <td>1행4열</td>
            </tr>
            <tr>
              <td>2행1열</td>
              <td>2행2열</td>
              <td>2행3열</td>
              <td>2행4열</td>
            </tr>
            <tr>
              <td>3행1열</td>
              <td>3행2열</td>
              <td>3행3열</td>
              <td>3행4열</td>
            </tr>
            <tr>
              <td>4행1열</td>
              <td>4행2열</td>
              <td>4행3열</td>
              <td>4행4열</td>
            </tr>
         </table>
      </body>
   </html>
↓

이외에도 MDN 홈페이지에 가면 많은 가상 클래스들을 확인할 수 있다.
| 요소 표시 상태(element display state) | 입력(input) | 언어(linguistic) | 위치(location) | *리소스 상태(resource state) |
|---|---|---|---|---|
| :fullscreen | :autofill | :any-link | :playing | |
| :modal | :enabled | :lang() | :link | :paused |
| :picture-in-picture | :disabled | :visited | ||
| :read-only | ||||
| :read-write | :target | |||
| :placeholder-shown | ||||
| :default | :scope | |||
| :checked | ||||
| :indeterminate | ||||
| :valid | ||||
| :invalid | ||||
| :in-range | ||||
| :out-of-range | ||||
| :required | ||||
| :optional | ||||
*리소스: 사용될 수 있는 어떤 항목. 시스템 리소스(프로그램이 활용할 수 있는 데이터나 루틴을 지칭), 네트워크 리소스(네트워크 상에서 활용할 수 있는 서버나 프린터 등을 지칭), 소프트웨어 리소스(프로그램, 유틸리티, 프로그램 내의 작은 구성 요소 등을 지칭), 데이터 리소스(액세스 할 수 있는 파일이나 데이터베이스 등을 지칭)을 통칭하는 말이라고 보면 됨.
| 시간 차원(time-dimensional) | 가계도 구조(tree-structural) | 사용자 행동(user action) | 함수(functional) |
|---|---|---|---|
| :root | :hover | :is() | |
| :empty | :active | :not() | |
| :nth-child | :focus | :where() | |
| :nth-last-child | :focus-visible | ||
| :first-child | :focus-within | ||
| :last-child | |||
| :only-child | |||
| :nth-of-type | |||
| :nth-last-of-type | |||
| :first-of-type | |||
| :last-of-type | |||
| :only-of-type | |||
*** 취소선이 그어진 가상 클래스들은 아직 개발 코드에는 사용할 수 없는 시험용이라고 하니 참조!
10. 코딩 연습 11: Checkerboard Exercise
주어진 코드에는 5×5의 상자가 정렬되어 있다.
<!DOCTYPE html>
   <html>
      <head>
         <title>Checkerboard</title>
         <link rel="stylesheet" href="css/styles.css?v=1.0">
      </head>
      <body>
         <div class="square"></div>
         <div class="square"></div>
         <div class="square"></div>
         <div class="square"></div>
         <div class="square"></div>
         <div class="square"></div>
         <div class="square"></div>
         <div class="square"></div>
         <div class="square"></div>
         <div class="square"></div>
         <div class="square"></div>
         <div class="square"></div>
         <div class="square"></div>
         <div class="square"></div>
         <div class="square"></div>
         <div class="square"></div>
         <div class="square"></div>
         <div class="square"></div>
         <div class="square"></div>
         <div class="square"></div>
         <div class="square"></div>
         <div class="square"></div>
         <div class="square"></div>
         <div class="square"></div>
         <div class="square"></div>
      </body>
   </html>
.square {
width: 100px;
height: 100px;
box-sizing: border-box;
border: 1px solid black;
}
#board {
display: flex;
margin: 0 auto;
width: 500px;
flex-wrap: wrap;
}↓

여기에 짝수번째 상자는 까만색으로 칠하고, 홀수번째 상자는 빨간색으로 칠하는 것이 미션이다.
그래서 추가한 코드는
.square:nth-of-type(2n) {
    background-color: black;
}
.square:nth-of-type(2n+1) {
    background-color: red;
}
↓

미션 클리어^^
사실 주어진 코드 중에서
flex-wrap은 한 번도 본 적이 없는 속성이다.
MDN을 찾아봤지만.. f;ex-box를 묶어주는 속성이라고 한다..무슨말이지...?? flex-box는 또 뭐니...ㅎㅎ
'프밍 > CSS' 카테고리의 다른 글
| DAY 30. 반응형 웹 디자인(Responsive Web Design) (1) | 2023.01.07 |
|---|---|
| Section 7. CSS 선택자의 세계(3) (1) | 2023.01.04 |
| DAY 29. 단원 마무리 문제 풀기 (0) | 2022.12.31 |
| DAY 28. CSS 애니메이션 (1) | 2022.12.30 |
| DAY 27. 트랜지션(transition) (1) | 2022.12.25 |